Just like everything else in life (house, car, body, etc.) owning a conversion van requires a tad bit of TLC every once in a while. Because you’ve basically bolted, screwed and adhered a bunch of stuff to a large, somewhat flexible, metal box, it should come as no surprise that things might loosen up after a while.

One of the things we love about our build is the simplicity and modularity of it. It doesn’t require a ton of tools or an advanced engineering degree to move things around or just to take them out. In the picture above, normally there is a large wooden storage box along this lower wall. The wheelie box is held down by the two bolts in the L-Track, some metal bars and 14mm nuts. Removal takes less than five minutes.

There is a lot going on here so let me explain. The white panel bolts to the four corners of the wooden structure you see above. That wood piece in turn is held in place to the van wall via the two center bolts which are attached to rivnuts. In addition to all that is the Kilmat on the wheel well, which I installed after purchase of the van (if you are interested in doing this, do it BEFORE you get your build out to make your life easier). The grey fabric, as seen in first picture, over the wheel well is held in place by a series of magnets.
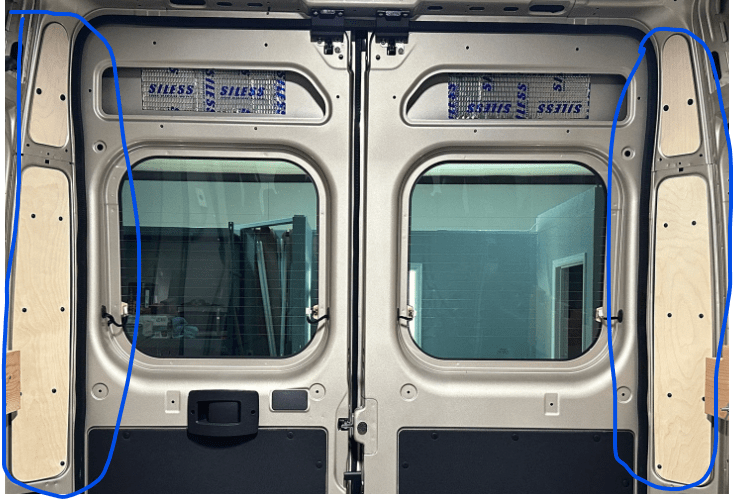
I wanted to pull the wall panel off to squeeze a bit more Havelock wool along the upper part of the wall, just behind the top of the wooden piece. The wool has drifted/settled a bit after five years of driving. I also noticed that the two bolts holding the wood to the van wall had loosened up a little.


For the past twelve months, any work involving removal or tightening of any of the bolts, I have dabbed a small amount of blue threadlocker on the threads to make sure that it doesn’t loosen up over the next five years.

I also removed the wall panel on the upper portion of the wall. Same basic structure as what is happening in the lower wall. You can see how I did Kilmat along these parts of the van wall too. Here the wool had settled significantly more than the lower wall. I squeezed more wool back here and also did the same threadlocker to the two bols in the center of the wood piece.

Because of the electrical system install I did back in 2022, that lower wall panel is pretty much never coming out again (well, it will, but just a lot of work to get that done). Most of my wires run behind it to the fuse box and into the battery below. I permanently attached this wood box to the wheelie box it sits on. I had put more wool back there while doing this electrical project.

I added more wool here back in 2022 also and it has not moved all since doing the elecrical system. Didn’t need to touch any of that side of the van, just the two rear passenger side wall panels today.

Simple way to spend a Sunday morning……..
What prompted me to do this was my next tiny project/improvement/tweak. I stumbled upon these rear wooden panels that I just think will give the van a bit more of a finished look compared to the stock black plastic.
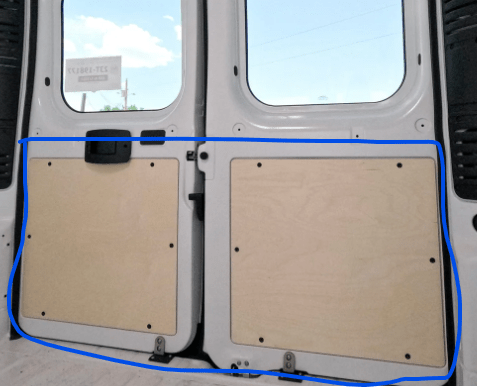
I found these wood panels at Out There Vans. The price is a bit of a premium, but they come ready with no guess work involved. My rough carpentry skills are okay, but my finish work leaves a bit to be desired. I haven’t decided if I will leave them raw with just a clear coat or paint/stain them some other color. This also falls in line with my constant tinkering. Just a nice simple winter project to keep me occupied.
Thanks for reading,
-Pete
