Today I am going to talk about installing a house battery system in our Wayfarer van Clifford. There are literally dozens of websites, videos, manuals, etc you can find online on how to wire up your van for some “off grid living”. Some of those websites charge money for schematics or detailed PDF documents (so you can support their #vanlife) however, many of them also offer plenty of free advice. I did find that most of them offer links to various products that they are getting some sort of commission off of though. It is up to you if you wish to support them or not using those links.
Most of the videos I found go way overboard and address a full system that charges off your alternator, uses solar and has shore power hookups too. Mia and my needs are pretty simple. We wanted enough juice to last several days and not worry about having to recharge our Jackery 1000 watt portable power station. Secondly we wanted to add some lighting and the ability to charge standard home outlet devices. One of the best websites I found was Courtandndate.com. They have a RAM Promaster like us so it was pretty easy to follow along. I also just happen to have a neighbor who has a side hustle building out #vanlife vans and basically flipping them. Paul was a huge help on my buildout.
Disclaimer: I am not a professional electrician (though my older brother is). Please take anything you read here as something I did on my own and not necessarily advice or instructions for your own van battery project.
There is oodles of information about calculating your required amperage and how big of a battery bank you need to build. I did “napkin math” and knew that our fridge runs about 2-2.5 days off 1000 watts before I felt we were getting too low. Add in the new lights with USB ports and our roof fan plus a 1000W inverter (converts DC power to AC power) at their peak might be drawing 70-75 watts an hour. That means I can run them all for about 50+ hours before the battery is out.

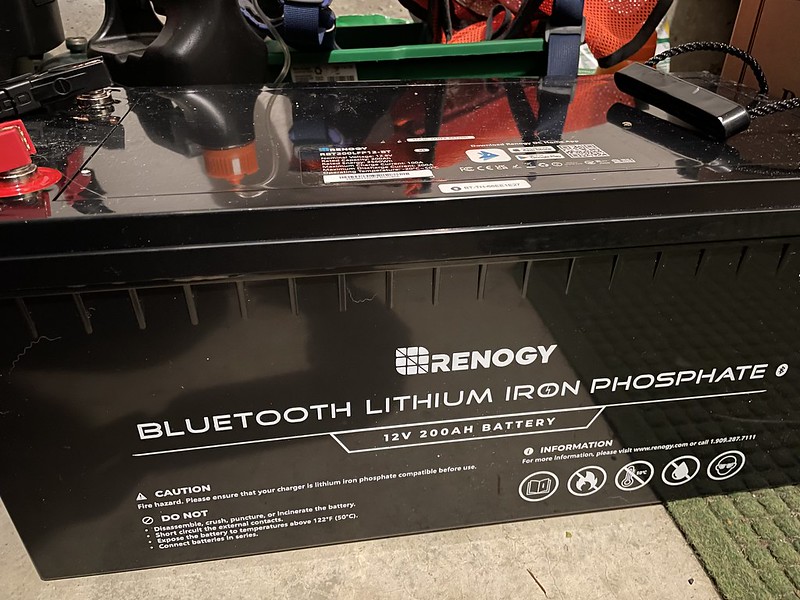
My main components are all recommendations from Paul. He steered me towards Renogy and their line of solar and van components. I’ll refrain from what each component does and just say use the Courtney & Nate link above where Nate talks extensively about what each product does and the best way to route wires on a Promaster.
At first the only thing I knew was the concept of how all of this equipment worked together. I remember basic science class stuff from school about the difference between direct current and alternating current. I get that too small of a wire could be a fire hazard. I knew I had to install fuses in the system to be safe too. What I didn’t really know was how the heck to piece all of this together into a cohesive and working system. Lucky for me I am kinda smart and can follow directions. Plus the internet, Paul M. and a text or two to my electrician brother.

I settled on a conservative estimate of maximum amperage draw and used 4 AWG (American Wire Gauge) to connect all my major power sending/receiving components together. Then I ran 16 AWG for all the individual components (lights, fan, 12V socket).

What was a totally new concept to me is busbars. I had no idea what this was or how it was used.
Busbars, also known as busbar trunking systems, distribute electricity with greater ease and flexibility than some other more permanent forms of installation and distribution. Sometimes spelled bus bar or buss bar, they are often metallic strips of copper, brass, or aluminum that both ground and conduct electricity.
https://www.starlinepower.com/busbar-faq/

You run the start cable to the DC-DC Charger (black box bolted to wood here) and then run the red power cable (right side of charger) to the red busbar. Then run a black grounding cable from charger to the black busbar. From the black busbar I then ran a ground cable back to the chasis of the van.

I’ll state it again, our needs/build is fairly simple. We have a house battery that charges off the van starter battery, no solar, no shore power charger. Basically when we are driving the charge controller is recharging the house battery. When we are not running the van everything runs off the house battery.
I then run all the minor electronics off of a 6 slot fuse box.
- roof fan
- Mia’s light
- Pete’s light
- 12V power socket (AKA cigarette lighter)
Down the road we will be adding a Webasto heater to the van which will take up one of the remaining slots (that’ll be its own blog post in the future). The sixth and final slot is TBD/unknown.

I will say that running all the electrical wires would have been significantly easier to do before the Wayfarer kit was installed. While removing the wall panels isn’t difficult it does add a degree to complexity and time suck to what should be a rather straightforward part of the wiring.
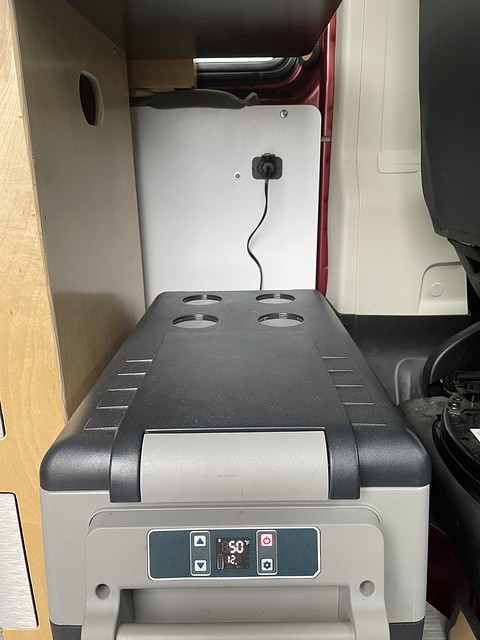
Previously we had to run the fridge power cable behind the kitchen vanity, along the floor, and to the Jackery battery that sat on the wheelie box. Now I just plug the fridge into the socket directly behind it. I can also just run the same cable to the 12V socket on the dashboard.

In order to keep the system from getting damaged from anything and to still allow us to store items on top of the wheelie box I built a box around the plywood I had mounted to the wall and added a hinged door should I ever need access to any of the components.
I also wired up the inverter after mounting it to the kitchen vanity. The inverter allows us to charge or run anything that would normally plug into a wall socket in your house. These items all run off of AC power and the inverter converts the DC power from your house battery into AC power. The most powerful thing we will be running off this is some sort of air conditioner unit for really hot camping trips. Right now we’ve been looking at the Zero Breeze unit.

So now we are fairly mobile with our power sytem. I more than doubled the amount of battery capacity going from the 1000 watt Jackery to the 200AH (2400 watts) renogy battery. We will still bring the Jackery on trips with us as a backup (I was a Boy Scout….be prepared). We will also have the ability to plug into “shore power” at campgrounds that have electrical hookups.
This “shore power” would mainly be used to run an air conditioner or other item to save draw on the house battery. We cannot charge the house battery from this setup but it does add a peace of mind and flexibility. Options are a good thing to have.
So that is a summary of our system. I tried to stay with the K.I.S.S. principle on this build out. All in all I spent about 12-15 hours doing it all. Maybe down the road we will add solar but for right now I don’t think it is needed for the type of traveling that we do.
Thanks for reading,
-Pete

4 Comments Add yours